


Introduction
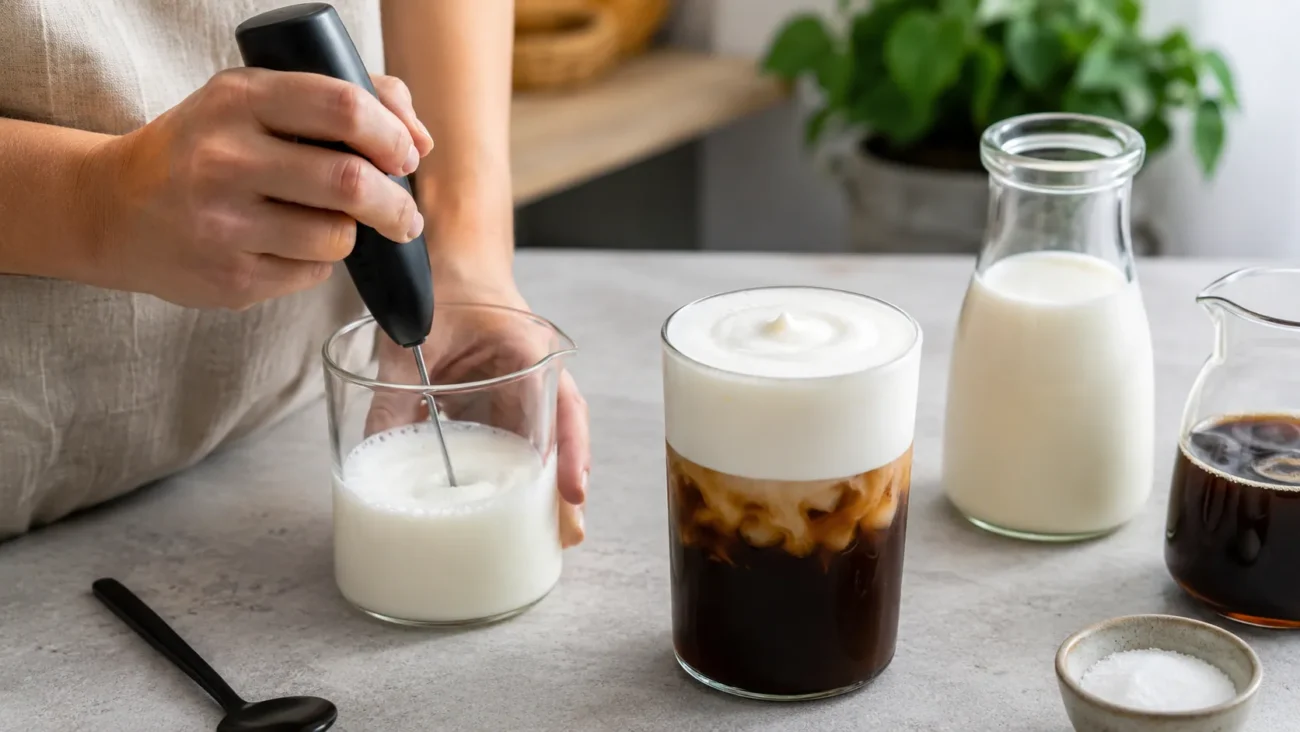
If you’ve ever wondered how coffee shops get that thick, cloud-like layer sitting on top of a cold brew, the answer is simpler than you might think: cold foam. It’s just a few basic ingredients, whipped up with a small frother, and you don’t need any barista training to get it right.
In this guide, we’ll cover both versions people usually mean when they say “cold foam” — the classic, lighter Starbucks-style foam, and the richer vanilla sweet cream version — along with a few real, tested tips that make the difference between foam that holds up and foam that turns into a bubbly mess after a few minutes.
Regular Cold Foam vs. Sweet Cream Cold Foam: What’s the Difference?
Before you start, it’s worth clearing up a common mix-up: “cold foam” and “sweet cream cold foam” aren’t the same thing, even though people often use the terms interchangeably.
Regular Cold Foam
This is made with just nonfat (skim) milk and a small amount of vanilla syrup, typically around one tablespoon. Because skim milk has no fat, it froths into a very light, airy, bubbly texture. It’s less creamy but has a satisfying, cloud-like consistency that sits neatly on top of a cold drink.
Sweet Cream Cold Foam
This version uses a combination of heavy whipping cream and 2% milk, along with vanilla syrup. The added fat from the cream makes this foam noticeably thicker, richer, and creamier than regular cold foam, closer in texture to a soft, pourable whipped cream.
Which One Should You Make?
If you want something light and simple, go with regular cold foam. If you’re after a richer, more indulgent topping, sweet cream cold foam is the better choice. Both are covered in this guide, so you can decide based on what you’re in the mood for.
What You’ll Need (Ingredients & Equipment)
Both versions of cold foam use simple, easy-to-find ingredients and just one piece of equipment.
For Regular Cold Foam
- Nonfat (skim) milk
- Vanilla syrup (about 1 tablespoon, or roughly two pumps if using a bottled coffee syrup)
For Sweet Cream Cold Foam
- Heavy whipping cream
- 2% milk
- Vanilla syrup
A Note on Syrup
Torani is a popular, widely available brand for vanilla syrup, found at most Walmart or Target stores. If you’d rather use the real thing, some Starbucks locations will sell you a bottle of their own syrup directly, just ask at the counter.
Equipment: A Milk Frother
You’ll need a handheld milk frother to whip the mixture into foam. These are inexpensive and widely available:
- Amazon — Typically $10-15 for a reliable handheld frother.
- IKEA — Often has basic frothers for around $5, usually found in the kitchen section of the marketplace.
- HEB (for those in Texas) — Frothers are commonly available in the coffee aisle for under $10.
If you plan to make cold foam often, it may be worth spending a bit more on a stronger frother, some users find that pricier options (around $20) hold up better over time and froth more effectively than the cheapest models.
Vanilla Sweet Cream Cold Foam
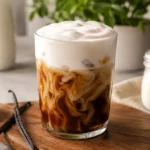
A rich, creamy Starbucks-style vanilla sweet cream cold foam you can make at home in under 2 minutes. Perfect for topping cold brew, iced lattes, or iced matcha.
- Handheld milk frother
- 3 tbsp heavy whipping cream
- 2 tbsp 2% milk
- 1 tbsp vanilla syrup
-
In a small cup or glass, combine the heavy whipping cream, 2% milk, and vanilla syrup. Stir well with a spoon until fully mixed — this step matters more than it seems, since properly incorporated ingredients froth much better.
-
Submerge the tip of a handheld milk frother into the mixture. Turn it on and froth for about 20-30 seconds, moving it slightly up and down.
-
Watch closely as you froth. Stop as soon as the mixture rises and the texture changes to a thick, pourable foam. If you keep going too long, it will turn into whipped cream instead.
-
Pour or spoon the cold foam directly on top of your favorite cold brew, iced latte, or iced coffee. It will float on top rather than mixing in.
Make sure to mix all three ingredients together thoroughly before frothing — this helps the mixture froth more evenly and consistently. Froth only until the foam rises and the texture changes; over-frothing will turn this into whipped cream instead of foam. This recipe makes enough for one cup of cold coffee; double or triple the recipe for multiple servings.
How to Make Regular Cold Foam (Starbucks-Style)
If you’d prefer the lighter, classic version instead of the richer sweet cream style, regular cold foam is even simpler to make, using just two ingredients.
What You’ll Need
- ¼ cup nonfat (skim) milk
- 1 tablespoon vanilla syrup (or about two pumps if using a bottled coffee syrup)
Step 1: Combine the Milk and Syrup
Pour the skim milk and vanilla syrup into a small glass or cup.
Step 2: Froth
Submerge the tip of your milk frother into the mixture and froth for about 20-30 seconds, until the foam has risen and thickened.
Step 3: Pour Over Your Drink
Spoon or pour the foam directly on top of your cold brew or iced coffee. It will sit on top rather than sinking in, thanks to the air incorporated during frothing.
Why Skim Milk Works So Well
It might seem counterintuitive, since skim milk has no fat, but that’s actually part of why it froths so effectively into light, airy bubbles. The lack of fat allows the milk proteins to trap air more easily, creating that classic, bubbly cold foam texture.
The #1 Mistake People Make (And How to Avoid It)
If your cold foam isn’t turning out right, there’s a good chance it comes down to one simple step that a lot of people skip: mixing the ingredients together before frothing.
Why Mixing First Matters
It’s tempting to just dump everything into a cup and stick the frother straight in, but properly stirring the milk, cream, and syrup together first, so they’re fully combined, makes a noticeable difference in how well the mixture froths. Without this step, the foam can turn out thinner, less stable, or inconsistent, since the frother is working against unevenly distributed ingredients rather than a smooth, unified mixture.
The Second Most Common Mistake: Over-Frothing
It’s easy to get carried away, especially the first time you try this, but frothing for too long will turn your cold foam into whipped cream instead. Watch closely and stop frothing as soon as the mixture rises and the texture visibly changes, usually somewhere between 20 and 30 seconds. If you notice stiff peaks forming, you’ve gone slightly too far.
A Quick Fix If You Overdo It
If your mixture does turn into whipped cream, it’s not a total loss, it just means you’ve made whipped cream instead of foam. You can still use it as a topping, though the texture and how it sits on your drink will be noticeably different from true cold foam.
How to Make Cold Foam Without a Frother
Don’t have a milk frother on hand? You’ve still got a few solid options.
French Press
Pour your milk, cream, and syrup mixture into the bottom of a French press. Pump the plunger up and down quickly and firmly until the mixture foams up.
Immersion Blender
Place the mixture in a glass or jar and submerge the blender head into it. Blend until the foam stabilizes and thickens, similar to how you’d use a handheld frother.
Regular Blender
If you’re making a larger batch for multiple servings, add the ingredients to a blender and blend until foamy and voluminous.
Mason Jar (No Equipment Needed)
If you don’t have any of the above, this method works in a pinch. Add your mixture to a mason jar, seal the lid tightly, and shake vigorously for 30-60 seconds. It takes more effort and a bit longer than the other methods, but it will still produce foam.
Troubleshooting Common Problems
Even with the right recipe, cold foam can sometimes go sideways. Here’s how to fix the most common issues.
Problem: The Foam Turns Bubbly After a Few Minutes
If your cold foam looks great at first but breaks down into a layer of large, watery bubbles shortly after, rather than staying thick and creamy, this is almost always linked to not mixing the ingredients thoroughly before frothing. Properly combining the cream, milk, and syrup first helps the foam hold its structure longer, rather than separating.
Problem: The Foam Isn’t Getting Thick Enough
If you’re using a plant-based milk like oat milk instead of dairy, you may need to adjust your ratios. Some users have found that dairy-free versions need a slightly higher ratio of cream to milk to reach the same thickness, for example, using 3.5 tablespoons of cream to just 1 tablespoon of milk, rather than the standard 3:2 ratio. If you’re using sugar-free syrup, it can also behave slightly differently than regular syrup, so a little trial and error with your ratios may be needed.
Problem: The Foam Deflates Too Quickly
This is often simply a sign of slightly under-frothing. If your foam isn’t holding its shape for more than a minute or two, try frothing for a few extra seconds next time, just be careful not to over-froth into whipped cream territory.
A General Tip
Cold foam recipes aren’t an exact science, and small variations in milk brand, cream fat content, or syrup type can all affect the final texture slightly. Don’t be afraid to adjust the ratios slightly based on your own results.
Flavor Variations to Try
Once you’ve got the base recipe down, it’s easy to switch things up with different flavors.
Lavender Cold Foam
Swap the vanilla syrup for a homemade lavender syrup, made by simmering dried lavender blossoms with sugar and water. This works especially well on an iced matcha or oat milk latte, adding a floral, slightly sweet note that pairs nicely with earthy matcha flavors.
Pumpkin Spice Cold Foam
For a seasonal twist, use a pumpkin spice syrup in place of vanilla. This works particularly well on a fall-flavored iced latte or cold brew.
Dairy-Free Cold Foam
Oat milk is a popular substitute for those avoiding dairy, and it froths well, though as mentioned earlier, you may need a slightly higher cream-to-milk ratio to get the same thick, stable texture.
Sugar-Free Cold Foam
If you’re cutting back on sugar, a sugar-free vanilla syrup works as a direct substitute in either the regular or sweet cream recipe. Keep in mind the texture may behave slightly differently, so don’t be surprised if you need to fine-tune your ratios.
A Simple Way to Experiment
Since the base recipe is really just a ratio of milk, cream, and flavoring, almost any syrup you enjoy in coffee can be swapped in. Start with a small batch when trying a new flavor, so you’re not wasting ingredients if the ratio needs adjusting.
How to Use Your Cold Foam
Cold foam isn’t limited to just one type of drink. Here are some of the best ways to use it.
Cold Brew Coffee
The most classic pairing. Pour your cold foam directly on top of a glass of cold brew for that signature layered look and taste.
Iced Lattes
Whether plain or flavored, an iced latte topped with cold foam adds a creamier, richer finishing touch.
Iced Matcha
Cold foam, especially flavored versions like vanilla or lavender, pairs particularly well with the earthy, slightly bitter notes of matcha.
Iced Chai Lattes
The warm spices in chai contrast nicely with the light, sweet creaminess of cold foam.
Regular Iced Coffee
You don’t need cold brew specifically, cold foam works just as well on standard iced coffee.
Frequently Asked Questions
What’s the difference between cold foam and sweet cream cold foam?
Regular cold foam is made with nonfat milk and vanilla syrup, giving it a light, bubbly texture. Sweet cream cold foam uses heavy cream and 2% milk along with syrup, making it noticeably thicker and richer.
Why does my cold foam turn bubbly after a few minutes?
This usually happens when the ingredients aren’t fully mixed together before frothing. Stirring the milk, cream, and syrup thoroughly first helps the foam hold its texture longer.
Can I make cold foam without a milk frother?
Yes. A French press, immersion blender, regular blender, or even a sealed mason jar shaken vigorously can all be used to create foam without a dedicated frother.
How long should I froth cold foam?
Typically 20-30 seconds, until the mixture rises and the texture visibly changes. Frothing too long will turn it into whipped cream instead of foam.
Can I use oat milk or another dairy-free milk?
Yes, though you may need to slightly increase the ratio of cream to milk to achieve the same thick texture as the dairy version.
What kind of syrup should I use?
Vanilla is the most classic choice, but any flavored syrup you enjoy, like lavender, pumpkin spice, or hazelnut, can be used as a substitute.
Conclusion
Making cold foam at home is one of those small kitchen skills that feels a lot more impressive than it actually is. With just a couple of ingredients, an inexpensive frother, and a bit of attention to timing, you can recreate that thick, creamy coffee shop topping without ever leaving your kitchen.
Whether you prefer the light, bubbly texture of regular cold foam or the rich, indulgent version made with sweet cream, the same core principles apply: mix your ingredients thoroughly before frothing, and stop as soon as the texture changes. Once you’ve got that down, you’re free to experiment with flavors and make it your own.
